
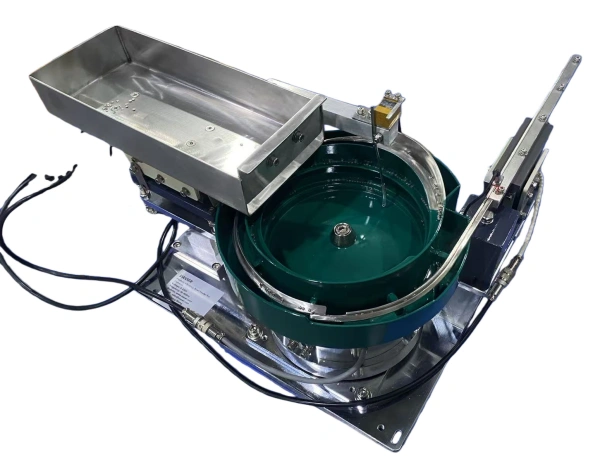
I. Typical Lifespan of a Vibratory Bowl Feeder
| Component / Condition | Typical Lifespan |
|---|---|
| Bowl body and track (stainless steel) | 10 – 20+ years (with proper care) |
| Springs / leaf springs | 3 – 5 years (depending on duty cycle) |
| Electromagnet coil | 5 – 10 years (or longer if not overheated) |
| Manette | 5 – 10 years (electronics wear; may need replacement if components age) |
| Rubber mounts / isolators | 3 – 5 years (rubber hardens and cracks over time) |
| Coating (Teflon, rubber, polyurethane) | 1 – 3 years (depending on part abrasiveness) |
Overall bowl life: A well‑built vibratory bowl feeder, properly maintained, can last 10–20 years or more. The bowl body itself is very durable; wear parts (springs, coatings, controllers) are replaced over time.
II. Factors That Shorten Lifespan
| Factor | Impact |
|---|---|
| Abrasive parts (ceramic, glass, sintered metal) | Accelerates track wear |
| Heavy parts (> 3 kg) | Increases stress on springs and electromagnet |
| Continuous 24/7 operation | Shortens spring and coil life |
| Poor maintenance | Leads to early spring fatigue, coil burnout, or track damage |
| Dusty or corrosive environment | Damages coils, springs, and control electronics |
| Over‑voltage or poor power supply | Can burn out the electromagnet or controller |
III. Regular Maintenance Checklist
A. Daily (Every Shift)
| Task | Action |
|---|---|
| Inspect bowl and track | Remove any parts stuck in the track or bowl. |
| Clean dust and debris | Use a brush or compressed air to clean the bowl, track, and springs. |
| Check for loose bolts | Tighten any loose mounting bolts (bowl to base, base to floor). |
| Listen for abnormal noise | Unusual sounds may indicate a loose spring, worn coil, or foreign object. |
| Check sensor alignment | Ensure sensors (fiber optic, proximity) are clean and correctly positioned. |
B. Weekly
| Task | Action |
|---|---|
| Inspect springs | Look for cracks, deformation, or rust on leaf springs. |
| Check spring bolts | Ensure spring clamping bolts are tight (correct torque). |
| Clean controller | Remove dust from controller vents (use compressed air). |
| Inspect cables | Check for fraying or exposed wires. |
C. Monthly
| Task | Action |
|---|---|
| Check electromagnet gap | The air gap between electromagnet and armature should be 0.2–0.5 mm (consult manual). Adjust if necessary. |
| Check rubber mounts | Look for cracks or hardening; replace if damaged. |
| Inspect track coating | If Teflon/rubber coating is worn, re‑apply or re‑coat. |
| Check feed rate | Measure parts/min; if decreased, clean track or re‑tune controller. |
D. Quarterly / Every 3 Months
| Task | Action |
|---|---|
| Check spring stiffness | Springs should be replaced if they have lost their original tension (usually every 3–5 years). |
| Inspect electrical connections | Tighten terminal screws; check for corrosion. |
| Calibrate controller | Check amplitude and frequency; adjust to maintain stable feeding. |
E. Yearly / As Needed
| Task | Action |
|---|---|
| Replace springs | If springs show fatigue (cracks or reduced amplitude), replace all springs as a set. |
| Replace rubber isolators | If they are hard or cracked, replace to maintain vibration isolation. |
| Re‑coat track | If Teflon or rubber coating is worn, have it re‑coated by a specialist. |
| Clean electromagnet surfaces | Remove dust and rust from the electromagnet face and armature. |
IV. Maintenance Summary Table
| Fréquence | Action |
|---|---|
| Daily | Clean, inspect for stuck parts, check noise, sensor alignment |
| Weekly | Inspect springs, clean controller, check cables |
| Monthly | Check electromagnet gap, rubber mounts, track coating, feed rate |
| Quarterly | Spring stiffness, electrical connections, controller calibration |
| Yearly | Replace springs, rubber mounts, re‑coat track, clean electromagnet |
V. Common Signs That Maintenance Is Needed
| Symptom | Possible Cause | Action |
|---|---|---|
| Parts not moving | Broken spring, loose connection, coil burned out | Inspect spring, check coil, repair/replace |
| Feed rate dropped | Worn track coating, dirty bowl, amplitude too low | Clean bowl, re‑tune controller, re‑coat track |
| Loud / unusual noise | Loose spring or bolt, worn coil, foreign object | Tighten bolts, inspect spring, remove foreign object |
| Parts jamming | Track worn, sensor misaligned, controller frequency wrong | Re‑align track, adjust sensors, re‑tune controller |
| Controller overheating | Poor ventilation, wrong voltage | Clean vents, check voltage, reduce amplitude if needed |

 French
  English
  Spanish (Mexico)
  Czech
Czech  Arabic
  Russian
  German
  Turkish
  Italian
  Ukrainian
  Polish
  Romanian
  Bengali
  Portuguese (Portugal)
  Thai
Thai  Japanese
  Korean
  Hebrew
  Uzbek
Uzbek  Hindi
Hindi  Slovak
  Vietnamese
  Portuguese (Brazil)
  Spanish (Peru)
  Spanish (Spain)
  Spanish (Venezuela)